- Published on
Create a Networking Server with Node.js
- Authors

- Name
- Dan Orlando
- @danorlando1
In the last article, we looked at Node's event driven architecture. We'll expand on that here to look at how to create a server and listen for data events on a socket that we can respond to. We'll then look at how to work with multiple sockets that can send messages to each other.
Create a Basic Node Server and Start Listening with a Client
Creating a Node server is super easy. First, use the net's module createServer method. Next, register a connection handler that fires every time a client connects. This handler also gives us access to a connected socket.
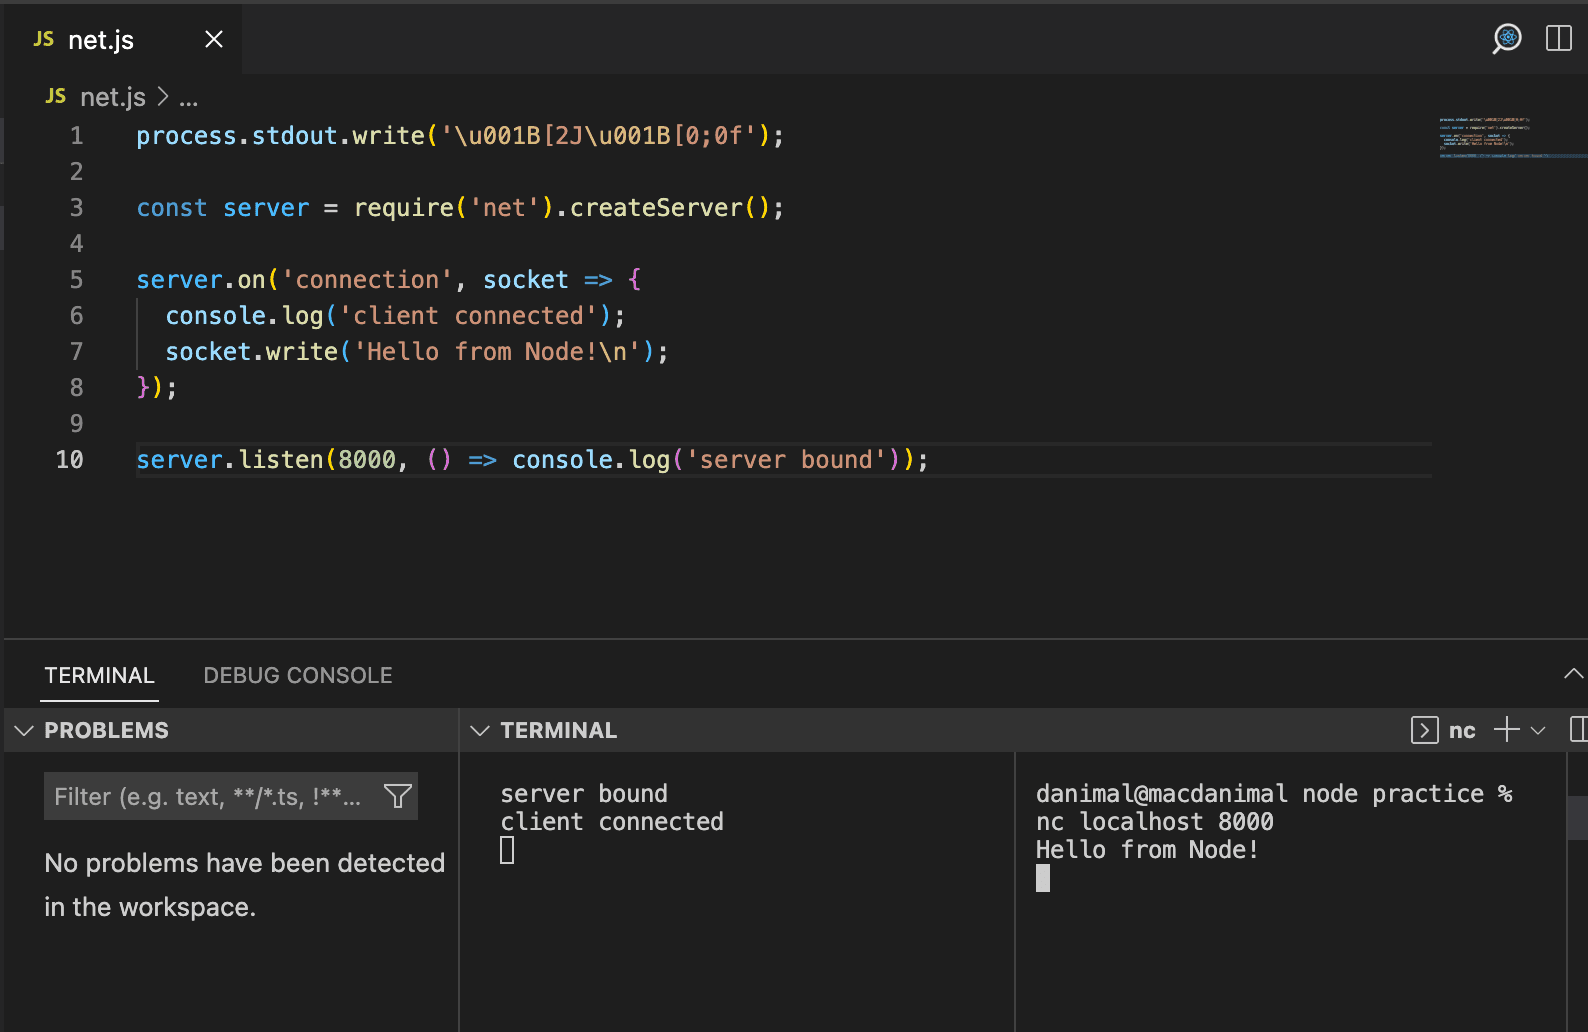
In the first terminal, we run the script with node server.js. This is our server. In the second terminal we use netcat to run nc localhost 8000, which is the client. The socket object implements a duplex stream interface. This means that we can read and write to it. To run the server, we need to listen to the port that we've specified as 8000 and the console log callback confirms that it is listening. Note that you can also use Telnet to connect to the server, which is easier to use on Windows.
When we run these commands in the two terminals, we first see "server bound" appear in the server terminal. This confirms that the server is listening. When we connect from the client, we get back the response "Hello from Node!", and we see "client connected" appear in the server terminal. This confirms that the client is connected.
Listening for data
As I mentioned above, the socket object implements a duplex stream interface. This means that socket is also an EventEmitter. You can read more about the EventEmitter in my article on Node's event-driven architecture. The socket being an event emitter means we can listen for events on it. The most common event is the data event, which fires when we receive data from the client. When we listen to the data event, the data event handler gives us access to a bufer object. This buffer object is a simple way to store data. To illustrate this, we can listen for the 'data' event send a text input to Node and have it echo the text back as the buffer in which it was stored.
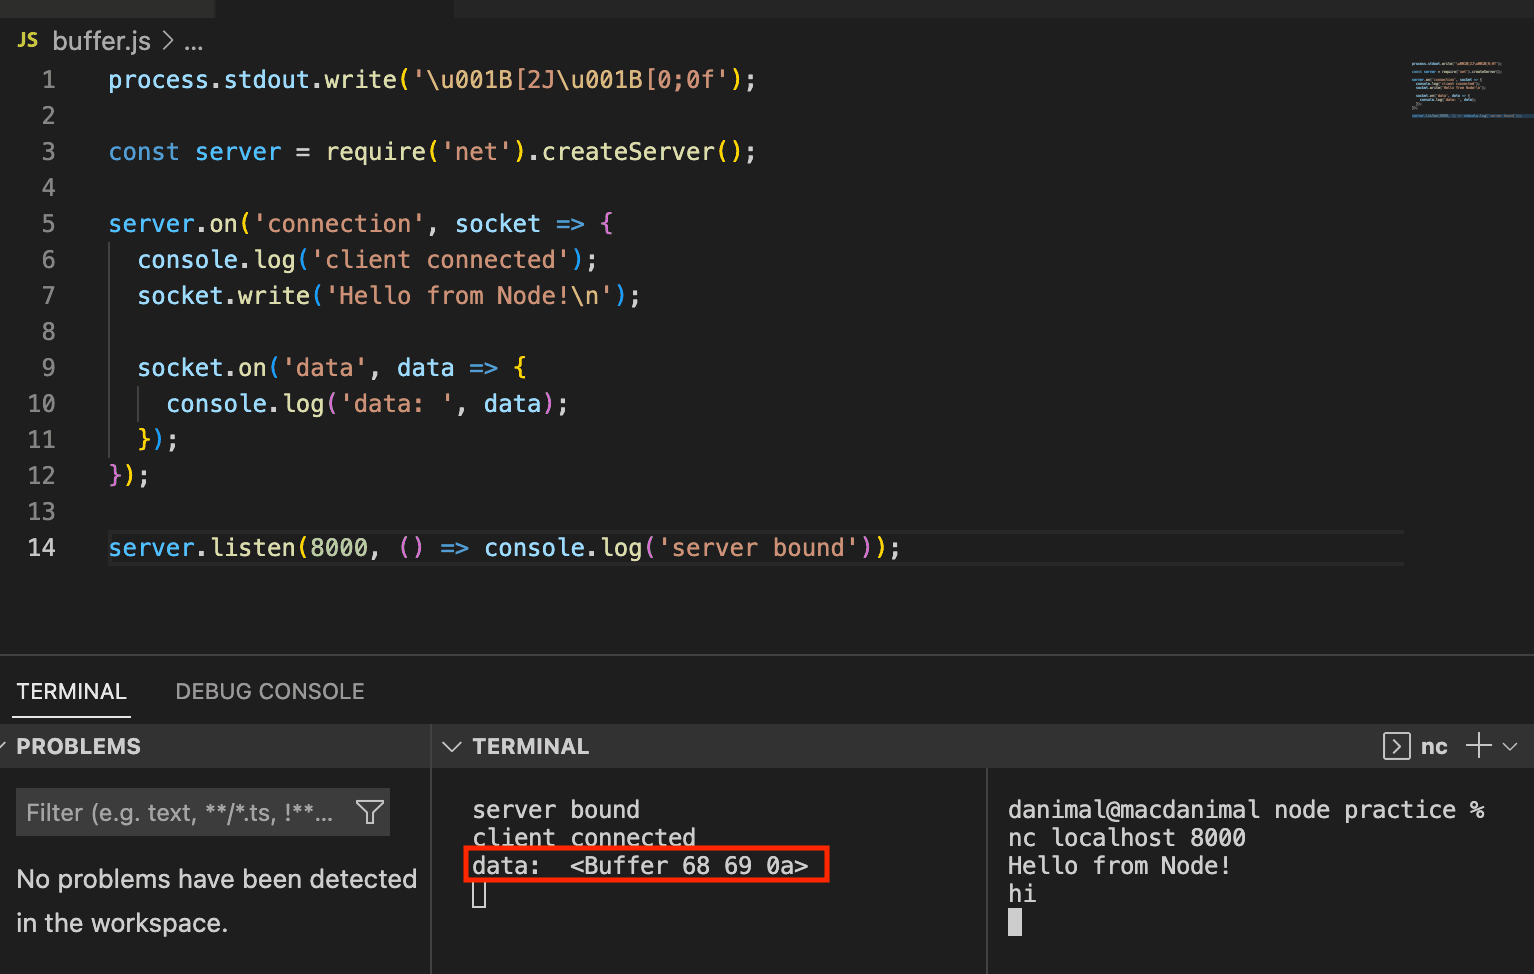
Node does not assume anything about encoding. The console log showed us the buffer that the text input was stored in, but if we socket.write the data back to the client, it will echo back the string in the form that it was sent.
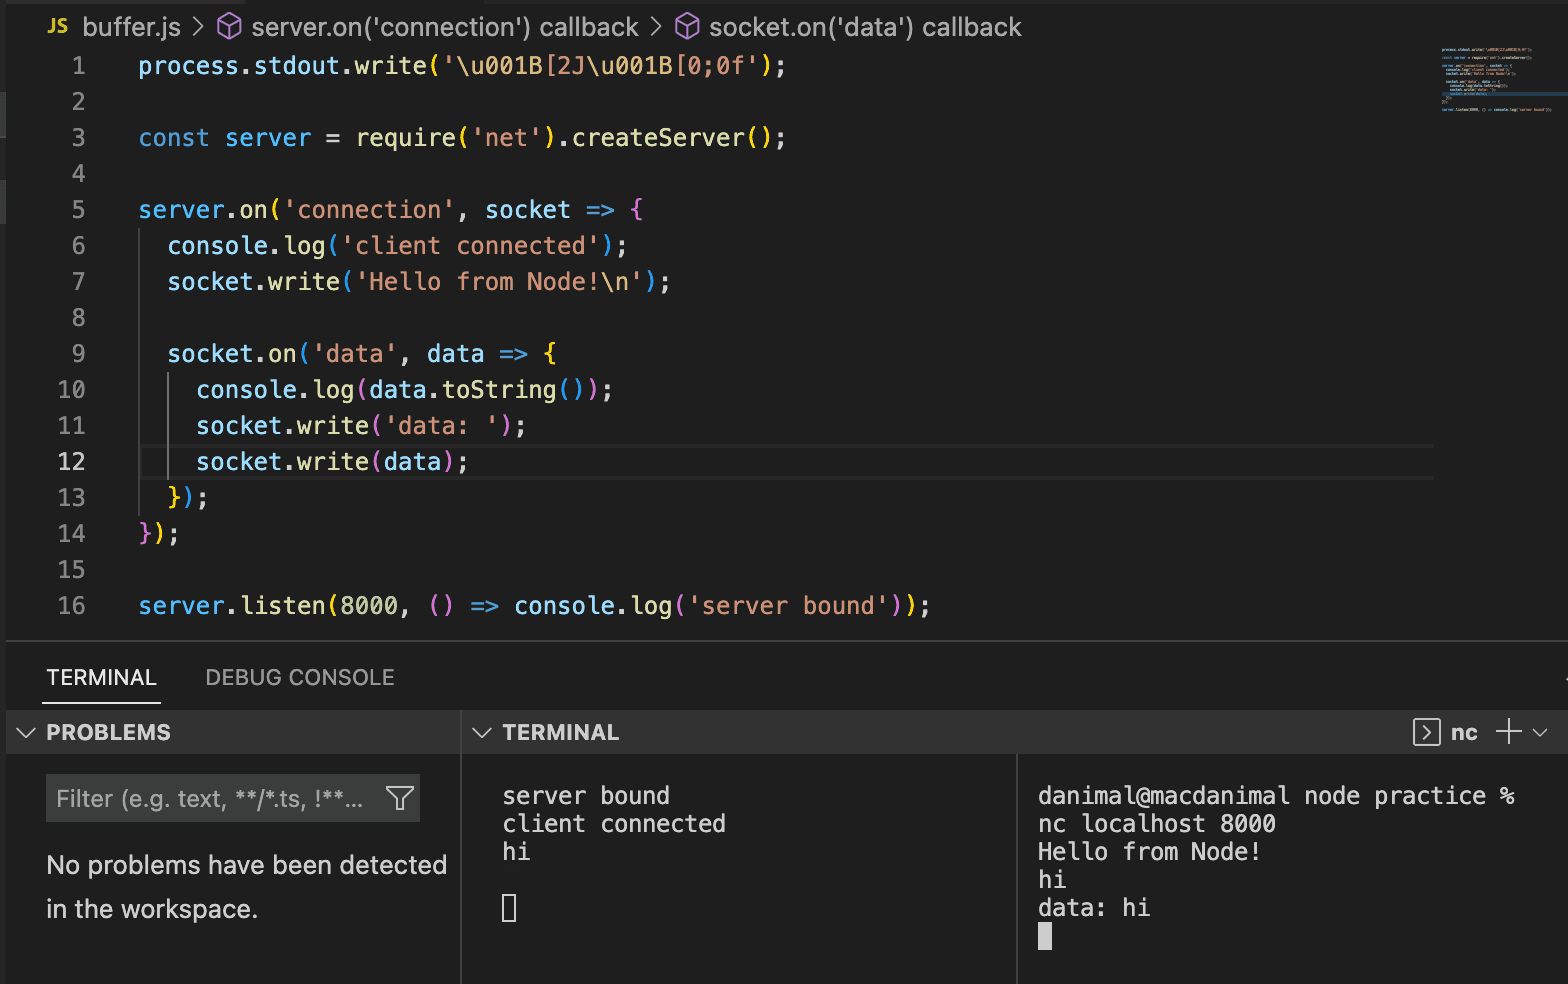
socket.write is an optional encoding argument, but the default is UTF-8. The encoding can be set globally with socket.setEncoding('utf8'). If we do this, the data will console log as a string instead of a buffer. 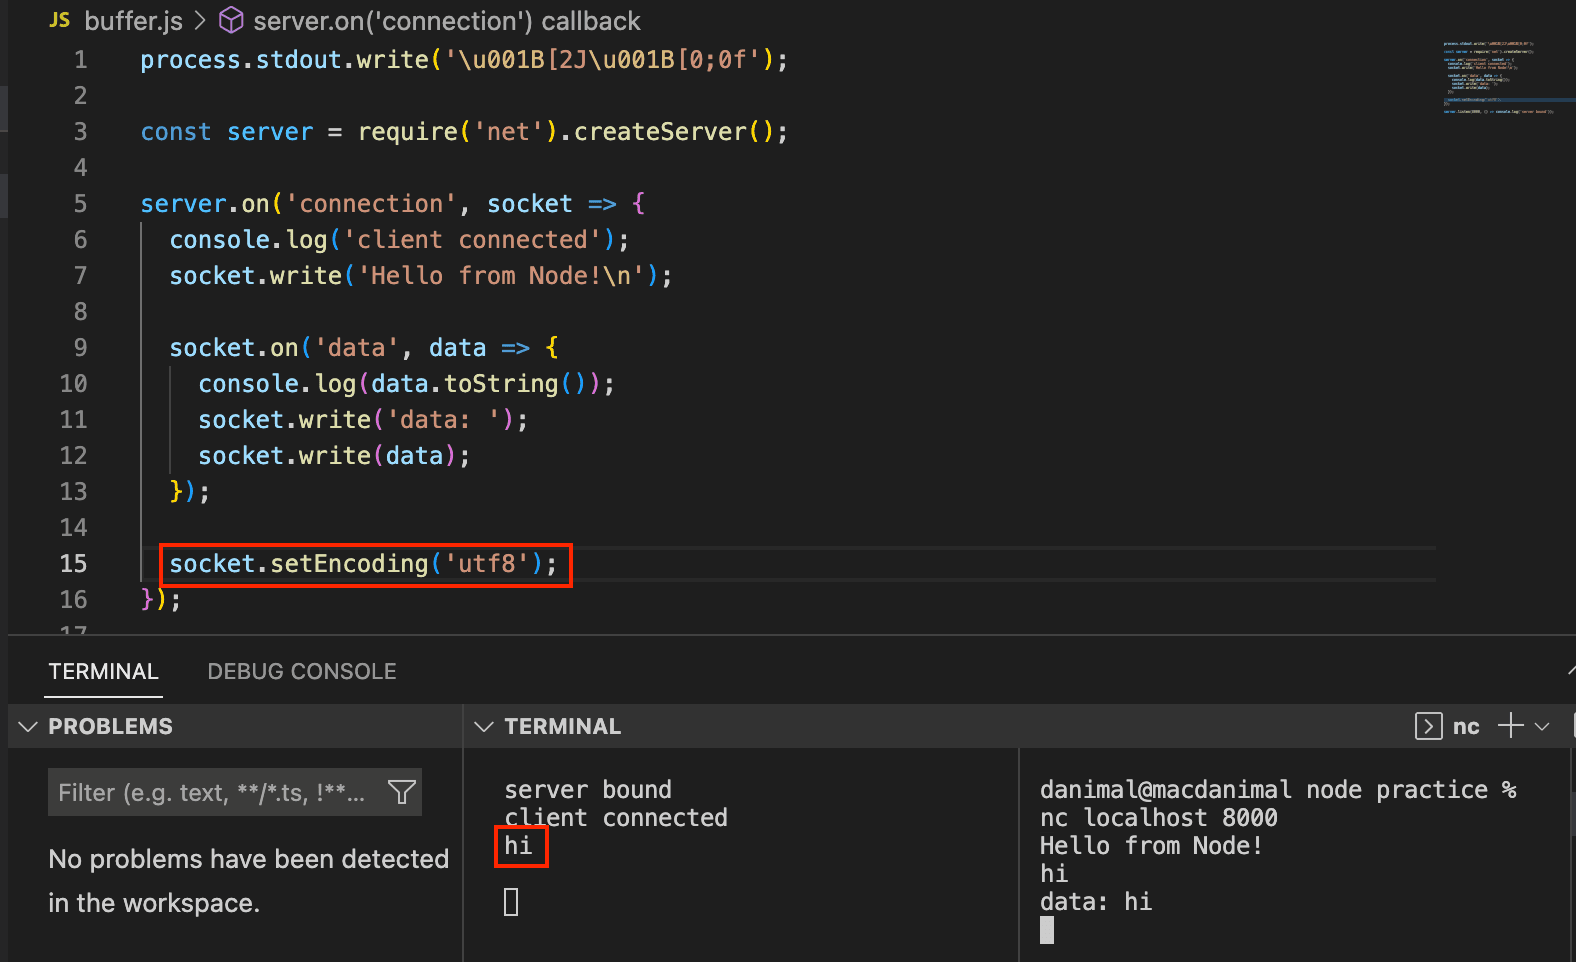
Working with Multiple Sockets
We can create multiple sockets and have them communicate with each other. In order to do this, we need to first keep track of the sockets by assigning each socket an id. We can do this by using the socket.id property. When we open another client terminal and connect to the server, we can see what the client's id is that was assigned to it by the server when we type a message into the client.
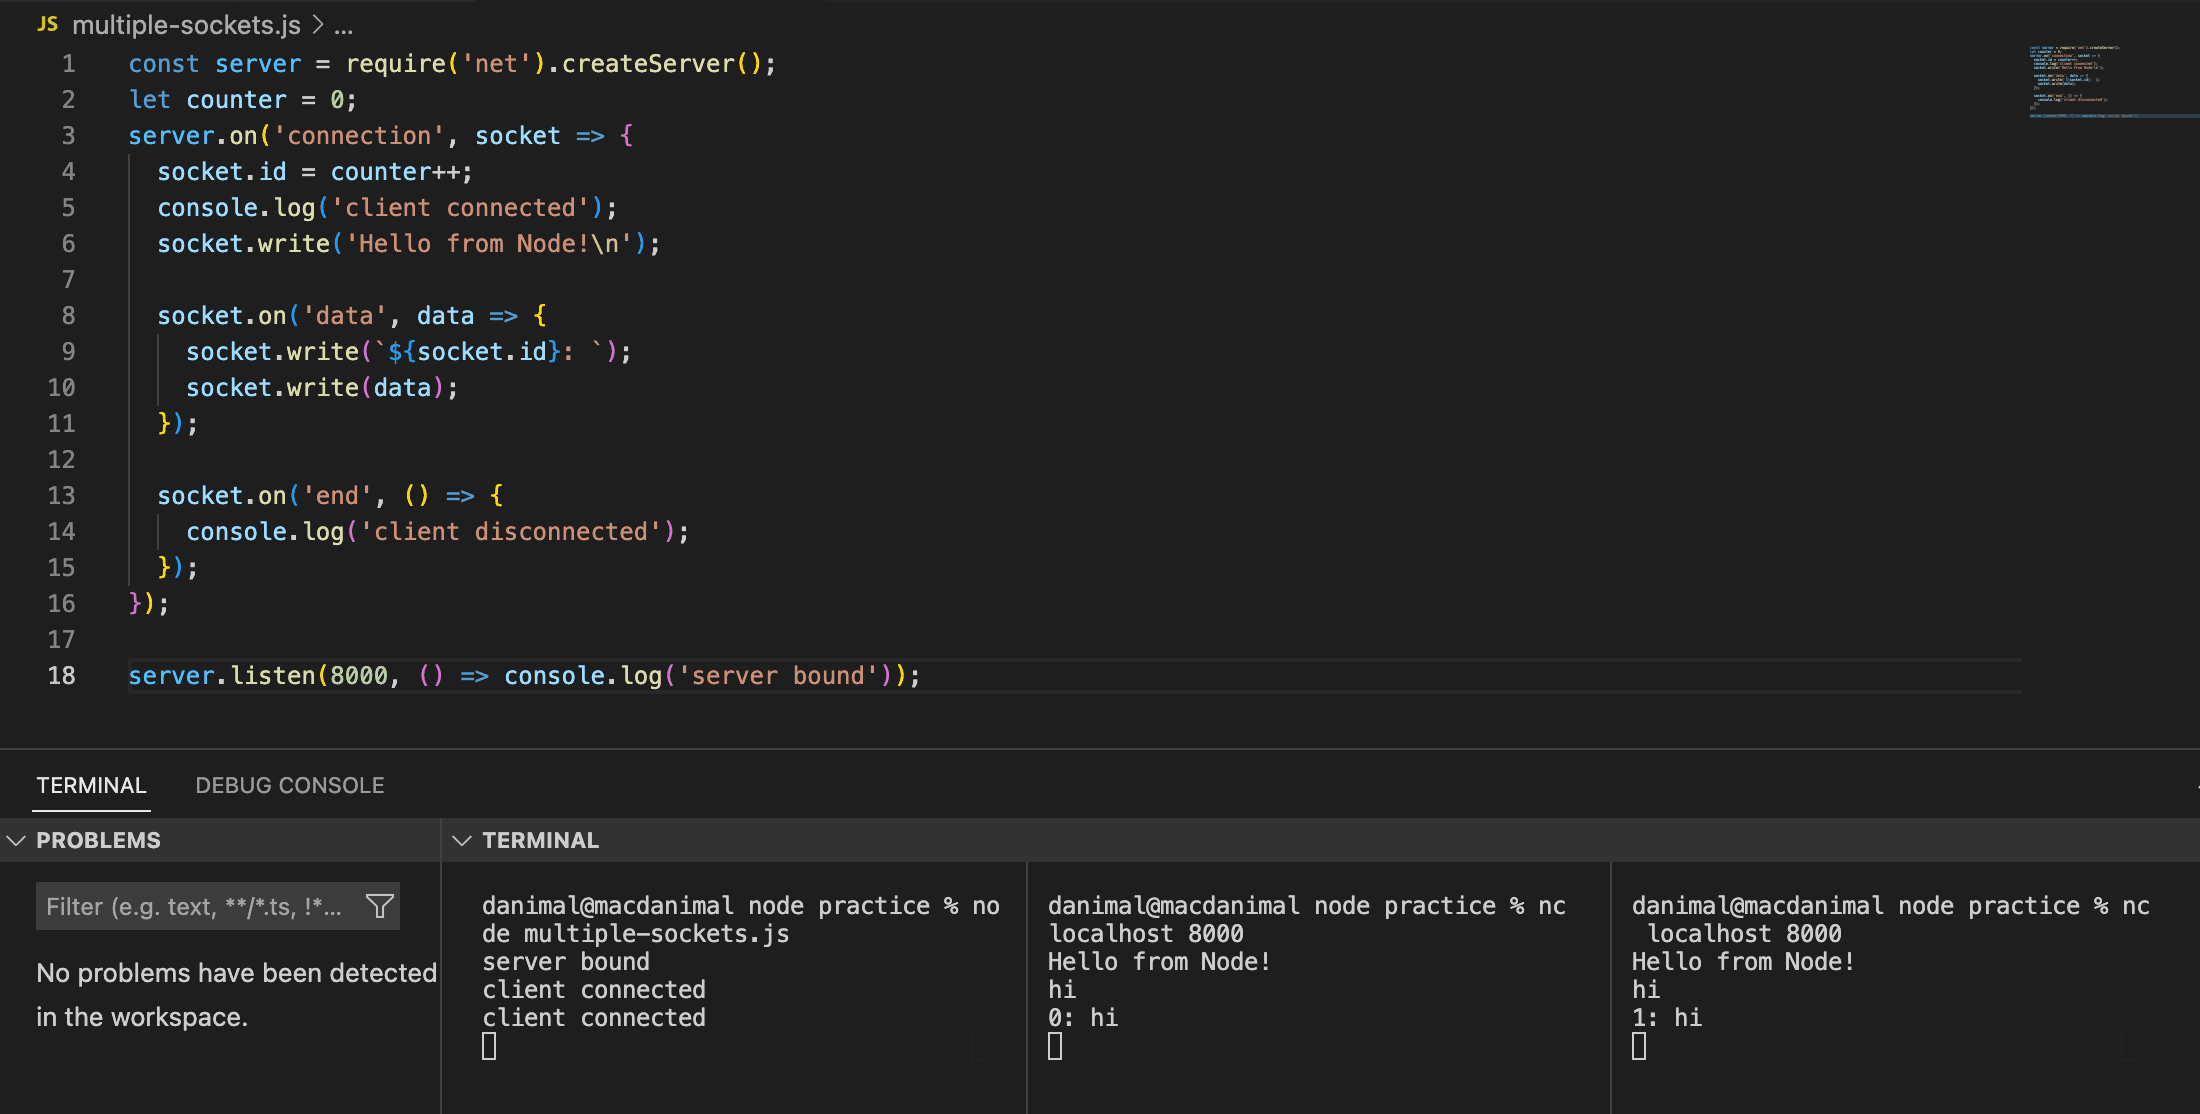
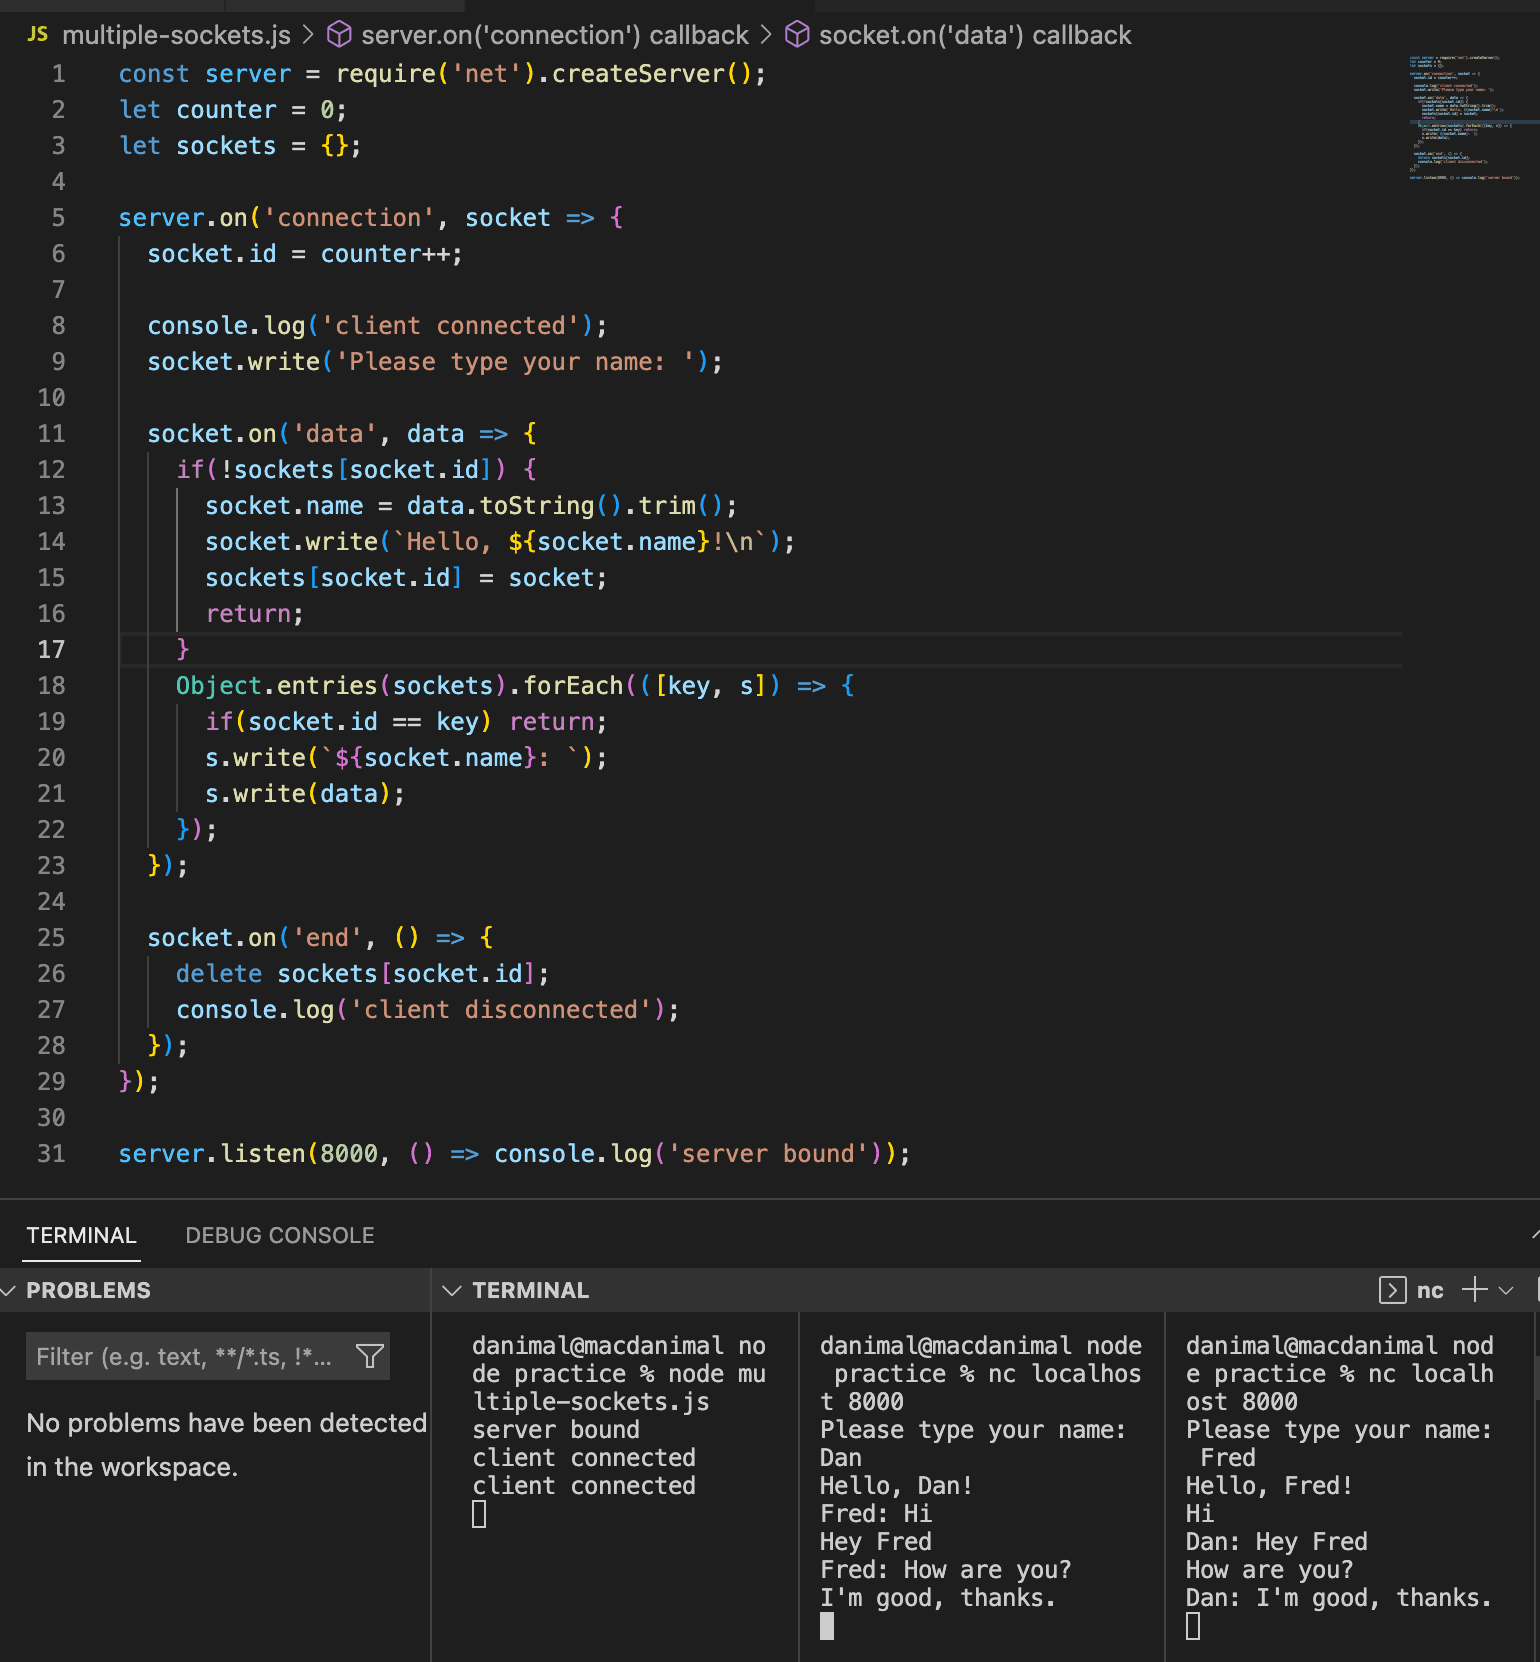
As a fun little experiment, we can create a rudimentary chat server with multiple clients. To do this, we create an object to keep track of the socket id's, then loop over them and write the data that was sent by one to all connected sockets.
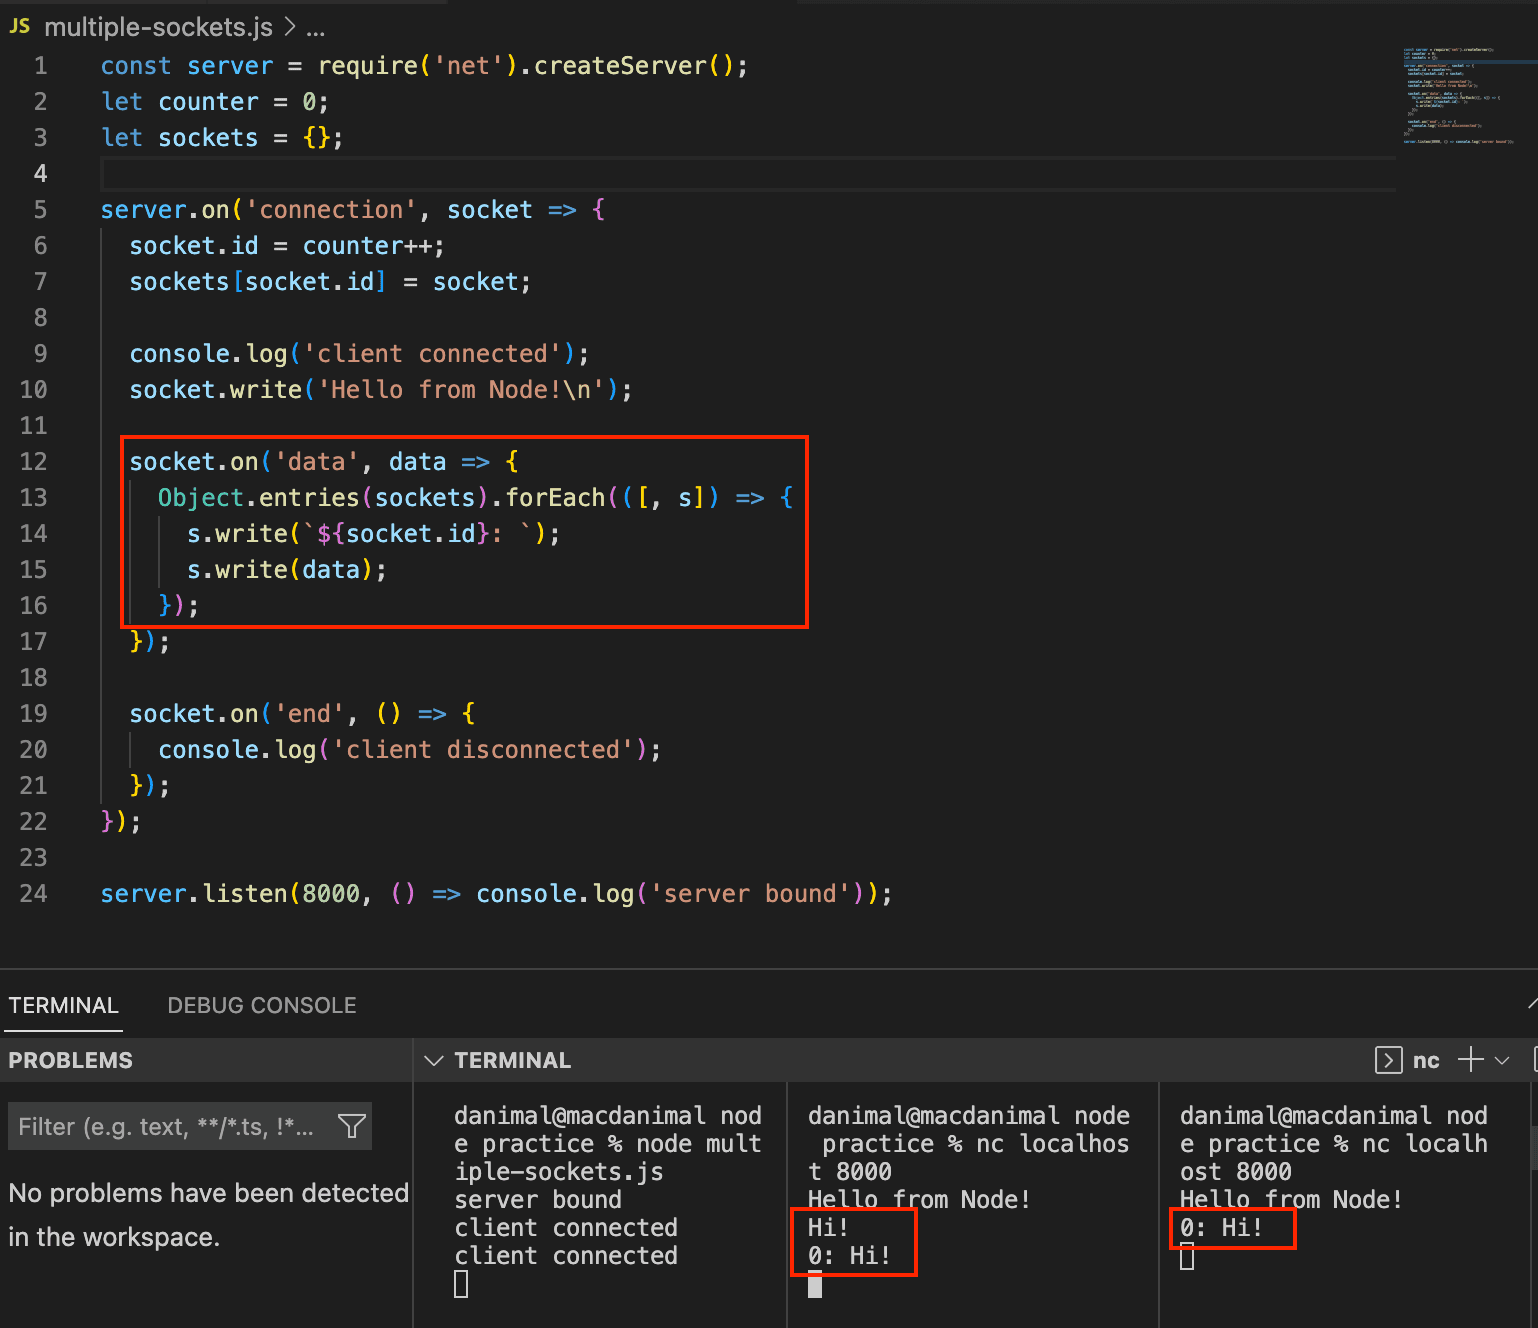
If this were a real application, we might use something like the more powerful socket.io platform, where we can use the
socket.broadcast.emitmethod to send a message to all clients except the one that sent the message.
There's one poroblem with this set up though. If a client disconnects, the server will not know that it's disconnected. Then if you type a message in the existing client, it will crash because the server is still trying to write to a socket that doesn't exist. To solve, this, we can tell node to delete the socket id when the socket 'end' event is fired.
  socket.on('end', () => {
    delete sockets[socket.id];
    console.log('client disconnected');
  });
We can make a couple of improvements to this chat server by allowing the user to assign a name to the client so that we can display it in the chat instead of the client id. We can also make a small change to make the message display in all clients except the one that it was sent from.
